When you want to print a document usingGoogle Docs, theres more to look, other than the content.
To print a document using Google Docs, you should take a look at your text.
The text includes elements like spacing between lines, paragraph style, course, and margins.
These are the key elements to have a good document.
They can be important for preparing essays, or other documents.
Among those elements, we will show you how to change margins in Google Docs document.
All of these methods are easy enough; you could choose whichever you would like to use.
If not visible, youll need to clickView > Show Ruler.
As a result, you will see a ruler on the top and left on your screen.
A vertical blue line will appear.
Drag the Ruler inwards or outwards to change the left margin.
double-check that youdont drag the rectangle and triangle separately.
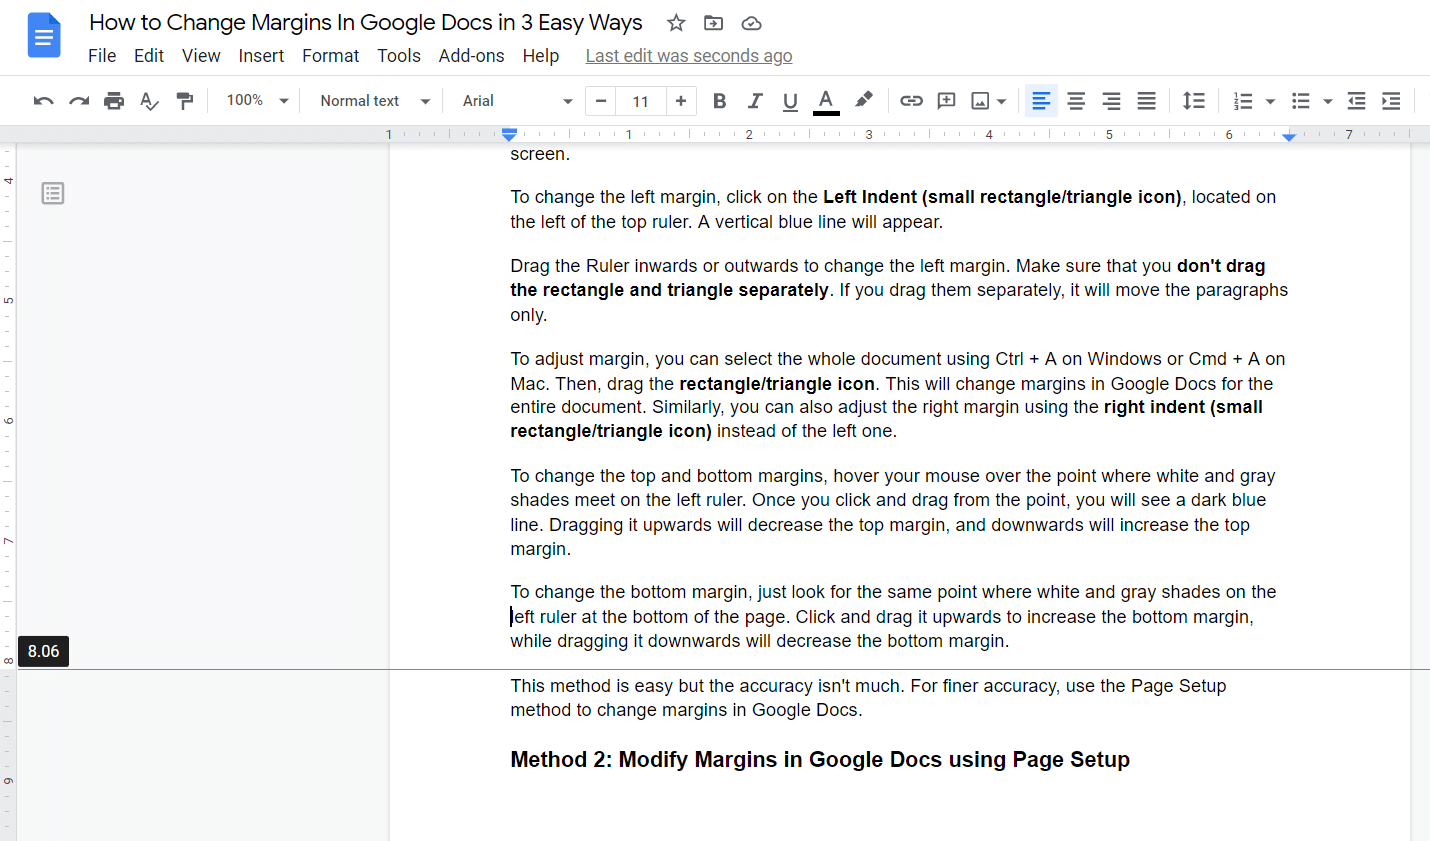
If you drag them separately, it will move the paragraphs only.
To adjust margin, you’ve got the option to pick the whole document usingCtrl+Aon Windows orCmd+Aon Mac.
Then, drag therectangle/triangle icon.
This will change margins in Google Docs for the entire document.
Once you click and drag from the point, you will see a dark blue line.
Dragging it upwards will decrease the top margin, and downwards will increase the top margin.
This method is easy but the accuracy isnt much.
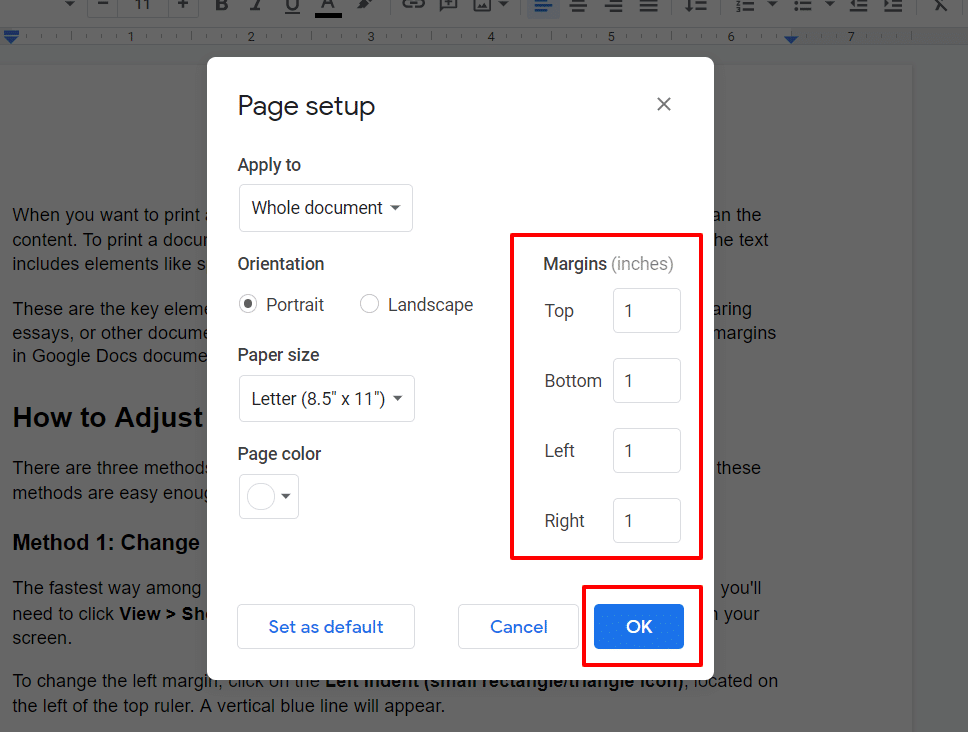
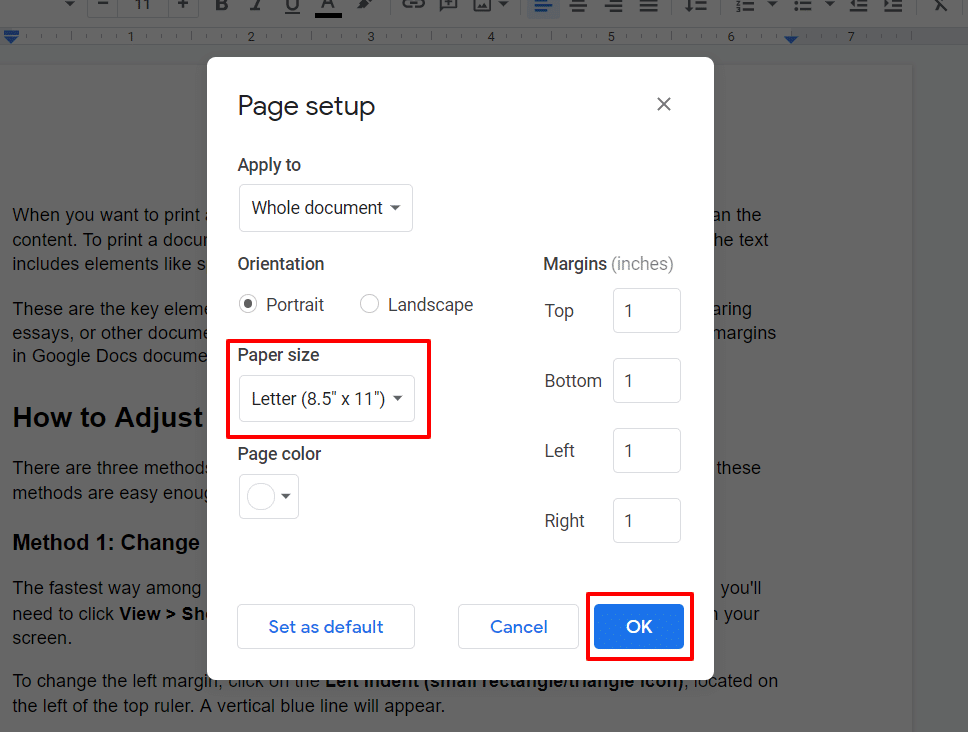
For finer accuracy, use the Page Setup method to change margins in Google Docs.
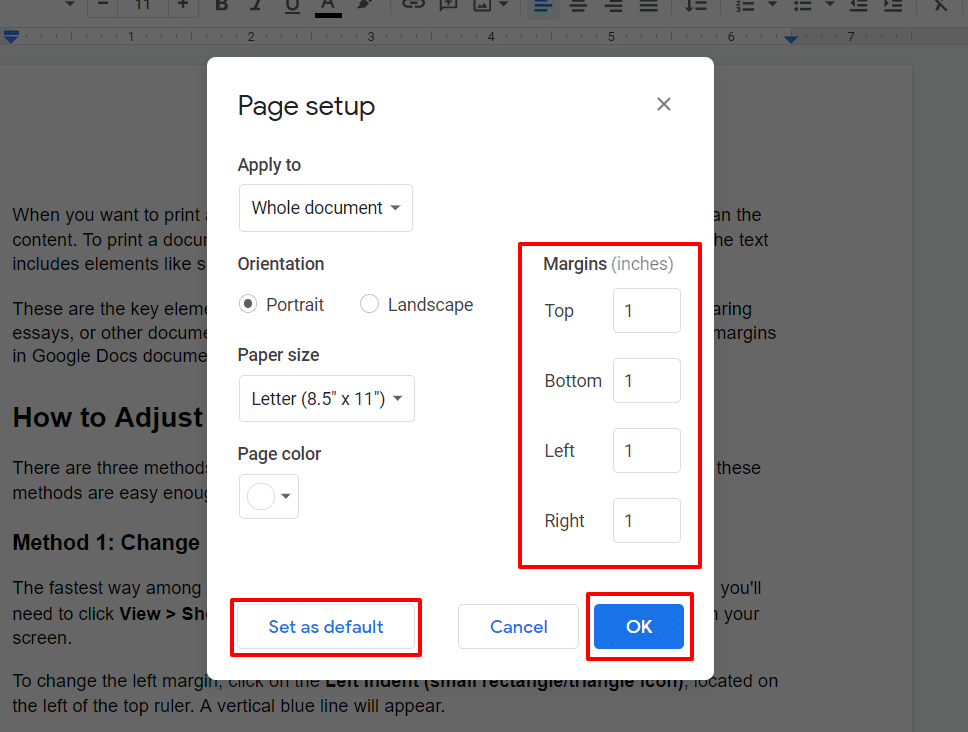
Set Default Page Margins Google Docs
Page Setupin Google Docs uses1-inchon each side as default margins.
it’s possible for you to set custom margin values as default for all pages.
When it comes to changing the margins, Google Docs offers different methods.
The ruler might be super-handy, and inaccurate at the same time.
If you use Page Setup, the accuracy escalates.
Depending on your needs, you’re free to use whatever option works the best for you.
